This post may contain affiliate links. As an Amazon Associate, I earn from qualifying purchases.
If you remember from my Triple Chocolate Bundt Cake post, I shared that our family recently participated in a community Easter play alongside many of our friends. This challah bread is another recipe we used that weekend.
Early Saturday morning before the 2:00 show, we spent the day mixing, kneading, dividing, and braiding loaves. During the performance, the bread was passed out to the crowd, and the girls also had the opportunity to sell loaves as part of a simple “Bible Times Marketplace.”

The play itself is free to attend and relies fully on donations to keep it running, so the marketplace served as a small fundraiser, with this challah bread sold alongside fresh flowers during and after the show. Before the night was over, we had multiple people asking for the recipe!
We use (mostly) My Father’s World curriculum in our homeschool, and this challah bread first started in our kitchen during a year we were studying Biblical feasts. Challah bread is a soft, slightly sweet bread that has roots going all the way back to Biblical times, where bread played an important role in meals, offerings, and gatherings. Over time, it became known for its braided shape and its place at the table during special meals and celebrations.
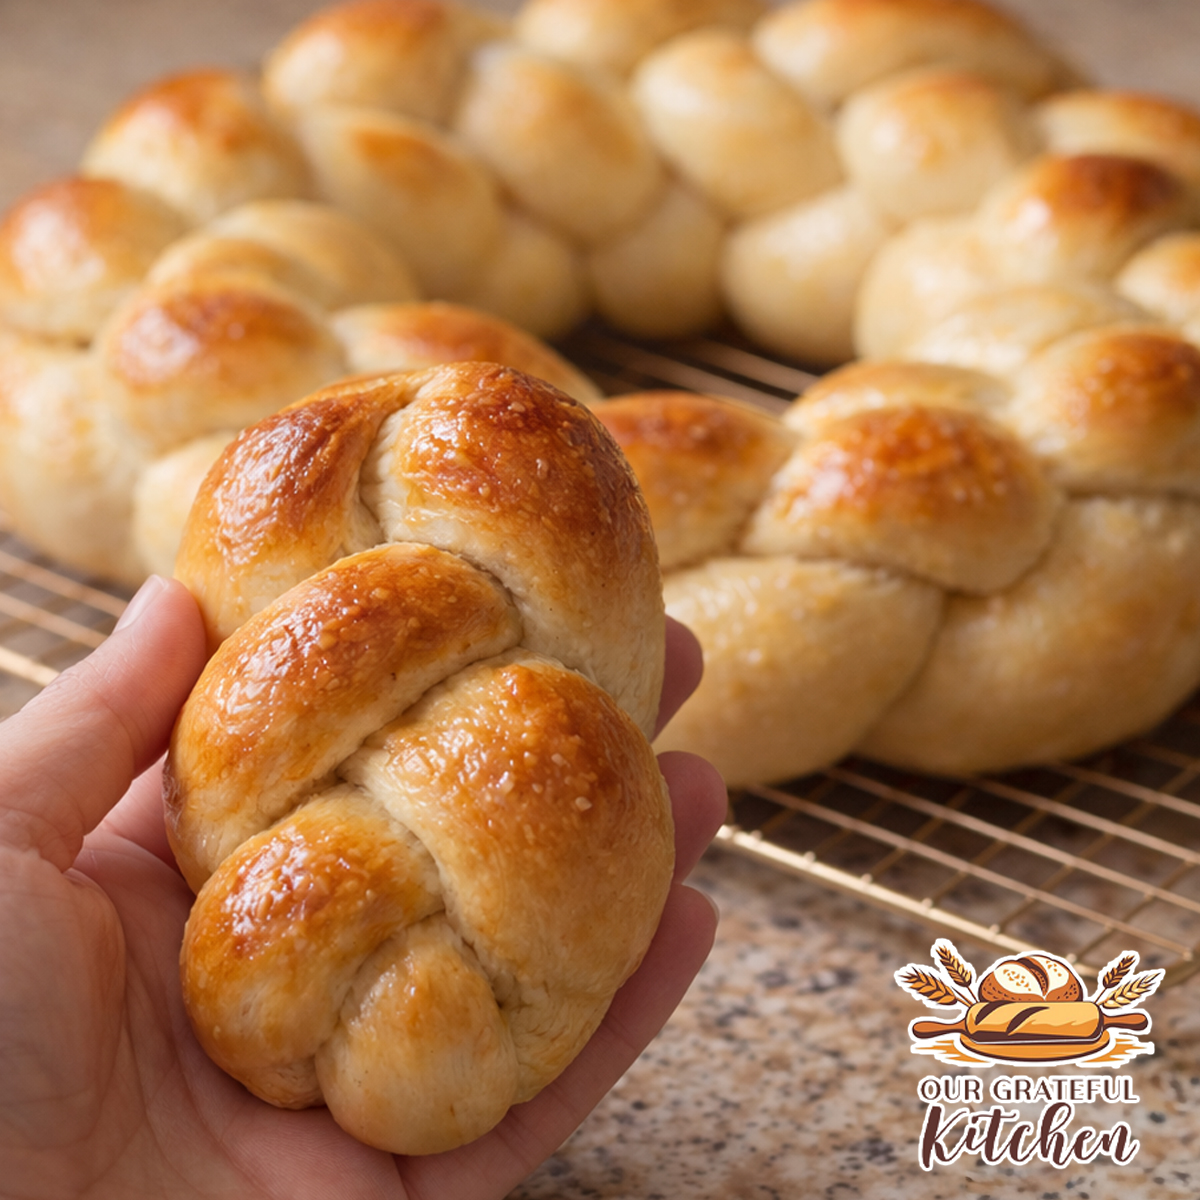
For the Easter play, we also shaped some of the loaves into rounds, which served as a simple visual reminder of the crown of thorns. It added another layer of meaning to a recipe that already carries so much history.
So here it is—the same soft, lightly sweet challah bread that works just as well for a family baking day as it does for feeding a crowd.
If you enjoy from-scratch baking like this, you might also like my other Homemade Bread Recipes or Sweet Breads or staples like Classic Vanilla Buttercream Frosting for pairing with sweeter bakes.
Why You’ll Love This Recipe
- Makes multiple loaves in one batch (great for sharing)
- Flexible shaping: large loaf, crowns, or mini braids
- Soft, tender texture with a lightly sweet flavor
- Simple pantry ingredients—no complicated steps
- A meaningful recipe that doubles as a family activity
Ingredients
- Yeast
- Sugar
- Oil
- Flour
- Salt
- Water
- Egg (optional, for egg wash)
- Poppy seeds (optional)
- Butter (optional, for brushing)

Equipment
- Stand mixer with dough hook – makes kneading quick and consistent
- Large mixing bowl – for proofing the dough
- Bench scraper – helpful for dividing dough evenly
- Food scale – highly recommended for even portions (this matters for final shape)
- Baking sheet – for baking loaves
- Parchment paper – prevents sticking and makes cleanup easier
How to Make
This dough comes together in a very straightforward way, but the details matter. You’re starting by activating the yeast in warm water with sugar, which gives it a head start and ensures your dough rises properly.

Once it’s foamy, you’ll build the dough by adding oil, salt, and flour until it forms a soft, workable texture.

The key here is not to overwork the dough early. You’re looking for something soft and slightly tacky—not dry. As you knead, the dough will smooth out and develop elasticity, which is what gives challah its structure and soft crumb.

After a short rise, the dough becomes easier to handle and shape. This is where your choices come in. You can turn this into one large braided loaf, three crown loaves, or nine mini braids. The method is the same—the difference is in how you divide the dough.

This is where using a food scale really matters. If your portions are uneven, the bread won’t bake evenly and your braids won’t look right. Taking a minute to weigh each portion gives you a much cleaner, more professional result.

")

Once divided, you roll the dough into ropes. Keep the thickness even from end to end—this is what creates a uniform braid. The braiding itself is simple, but consistency is what makes it look polished.


For crown loaves, you’ll bring the braid into a circle and pinch the ends together. For mini braids, you’ll keep them small and simple. After shaping, the second rise allows the dough to relax and puff slightly, which helps the final texture. See FAQs at the bottom to see a full sized braided loaf!
Before baking, you can choose your finish. An egg wash gives you that classic glossy look, while butter creates a softer crust. Both work—it just depends on the result you want.


Baking at a lower temperature keeps the bread soft and prevents it from over-browning too quickly. You’ll know it’s done when it’s lightly golden and sounds hollow when tapped.
 – Easy Bible Feasts Recipe")
This post may contain affiliate links. As an Amazon Associate, I earn from qualifying purchases.
PrintChallah Bread (Braided Crown Loaves or Mini Braids)

Soft, lightly sweet homemade (almost) traditional challah bread shaped into braided crown loaves or mini braids. This simple oil-based recipe is perfect for sharing, holidays, and baking in batches.
- Prep Time: 15 minutes
- Rise Time: 1 hour 30 minutes
- Cook Time: 20 – 30 minutes (varies by size)
- Total Time: 2 hours 15 minutes
- Yield: 1 large loaf, 3 crown loaves, or 9 mini loaves
- Category: Bread
- Method: Baking
- Cuisine: Jewish-Inspired
Ingredients
- 1 tablespoon active dry yeast
- 3 tablespoons sugar
- 1 cup warm water (105–110°F)
- 1/3 cup oil
- 3 1/4 cups all-purpose flour
- 1/2 teaspoon salt
Optional:
- 1 egg (for egg wash)
- 1 tablespoon water (for egg wash)
- Poppy seeds (for topping)
- Melted butter (for brushing after baking)
Instructions
- In a large bowl, combine warm water, sugar, and yeast. Let sit 5–10 minutes, until foamy.
- Add oil, salt, and 3 cups of flour. Mix until a soft dough forms.
- Add the remaining 1/4 cup flour as needed until the dough comes together.
- Knead until smooth and elastic, about 6–8 minutes by hand or 4–5 minutes in a stand mixer.
- Place dough in a lightly oiled bowl, cover, and let rise in a warm place for 30 minutes, or until slightly puffed.
- Punch down the dough.
- Divide dough based on desired shape:
- Large braided loaf: divide into 3 portions (roll each into a rope)
- Crown loaves: divide into 3 portions, then divide each portion into 3 ropes (9 ropes total)
- Mini braids: divide into 9 portions, then divide each portion into 2 ropes (18 ropes total)
- Roll dough into ropes and braid.
- Shape crown loaves into circles and pinch ends to seal. (See post for how-to.)
- Place on a lined baking sheet, cover, and let rise for 1 hour, or 30 minutes in a 150°F oven.
- Preheat oven to 300°F.
- For a glossy finish, brush with egg wash (1 egg + 1 tablespoon water).
**For a softer crust, brush with melted butter instead. - Sprinkle with poppy seeds if desired.
- Bake based on size:
- Mini braids: 20–25 minutes
- Crown loaves: 25–30 minutes
- One large loaf: 35–40 minutes
- Bake until lightly golden and the bread sounds hollow when tapped.
- Brush with melted butter after baking if desired.
Notes
- Dough should be soft and slightly tacky, not dry.
- Do not overheat the water—too hot will kill the yeast.
- Smaller loaves bake faster, so begin checking early.
- This is an oil-based challah, not a traditional egg-rich version.
- Egg wash gives a glossy, golden finish; butter gives a softer crust.
Recipes That Pair Well With This
- Homemade Garlic Butter
- Homemade Honey Butter
- Homemade Strawberry Vinaigrette
- The Best Homemade Alfredo Sauce
- Greek Yogurt Ranch Dressing
- Fresh Egg Pasta Dough
More Recipes to Try
- Instant Pot Hard Boiled Eggs
- Easy Vanilla Cupcakes
- Chocolate Chip Cookie Cake
- Lemon Sugar Cookie Bars
- Sugar Cookie Bars with Buttercream
- Banana Cream Bundt Cake
- Sourdough Discard Pancakes
- Bakery-Style Cinnamon Rolls
- Buffalo Chicken (Instant Pot)
- Buffalo Chicken Bacon Ranch Tacos
Tips for Little Helpers
This is a great recipe for kids to be part of. Let them help roll the dough into ropes, which is one of the easiest and most forgiving steps. They can also help with braiding—even if it’s not perfect, it still bakes beautifully.

Brushing the bread with butter or sprinkling seeds is another simple way to get them involved. Recipes like this are less about perfection and more about the experience.
This recipe is egg free, so peel off a piece to give to your toddlers to use like “playdoh” while you work! And if they eat it, no problem! They love to practice “braiding” along side you!
Tips for Success
- Use a food scale when dividing dough for even baking
- Keep dough soft—too much flour will make it dense
- Roll ropes evenly for consistent braids
- Don’t skip the second rise—it affects final texture
- Check smaller loaves early to avoid overbaking
FAQs
Can I make this as one large loaf instead of multiple smaller ones?
Yes, this dough works well as a single large braided loaf. Just divide into three portions, braid, and adjust the baking time to 35–40 minutes.

Do I have to use an egg wash?
No. Egg wash gives a glossy finish, but melted butter creates a softer crust. Either option works depending on your preference.

Why is my challah bread dense instead of soft and fluffy?
Dense challah is usually caused by too much flour or not enough kneading. The dough should feel soft and slightly tacky, not dry. Proper kneading develops gluten, which gives the bread its structure and light texture. Under-proofing can also lead to dense bread, so make sure the dough has time to rise and become slightly puffy before shaping.
How do I know when challah is fully baked?
Challah is done when it’s lightly golden and sounds hollow when tapped on the bottom. You can also check the internal temperature—fully baked bread should be around 190–200°F. Smaller loaves will bake faster, so start checking early to avoid overbaking.
Can I make the dough ahead of time?
Yes, you can prepare the dough ahead and let it rise slowly in the refrigerator. After kneading, cover the dough and refrigerate for up to 24 hours. When ready to use, let it come to room temperature before shaping and continuing with the second rise. This can also improve flavor slightly.
Can I make this challah bread gluten-free?
This specific recipe relies on gluten for structure and braiding, so it doesn’t convert directly to gluten-free flour. Gluten-free doughs behave differently and typically require a separate, tested recipe for best results.
Why did my braids bake unevenly?
This usually comes down to uneven dough portions or ropes that weren’t rolled evenly. Using a food scale helps prevent this.
Can I make this for a special event or gathering?
Absolutely. This recipe is ideal for making multiple loaves at once, which makes it perfect for sharing or serving a crowd.
Storage
Store baked challah in an airtight container at room temperature for up to 3 days. For best texture, keep it wrapped to prevent drying out.
Freezing Instructions
Challah freezes well. Let the bread cool completely, then wrap tightly and freeze for up to 2 months. Thaw at room temperature and warm slightly before serving if desired.
Variations
- Add sesame seeds instead of poppy seeds
- Make a sweeter version by increasing sugar slightly
- Shape into traditional long loaves instead of crowns
- Brush with honey butter after baking for a softer finish
Final Thoughts
This is the kind of recipe that becomes part of your routine—not because it’s complicated, but because it works. It’s flexible, reliable, and easy to adapt depending on what you need, whether that’s one loaf for your table or several to share.
And like most good recipes, it’s not just about the bread—it’s about what happens around it.
Leave a Reply