This post may contain affiliate links. As an Amazon Associate, I earn from qualifying purchases.
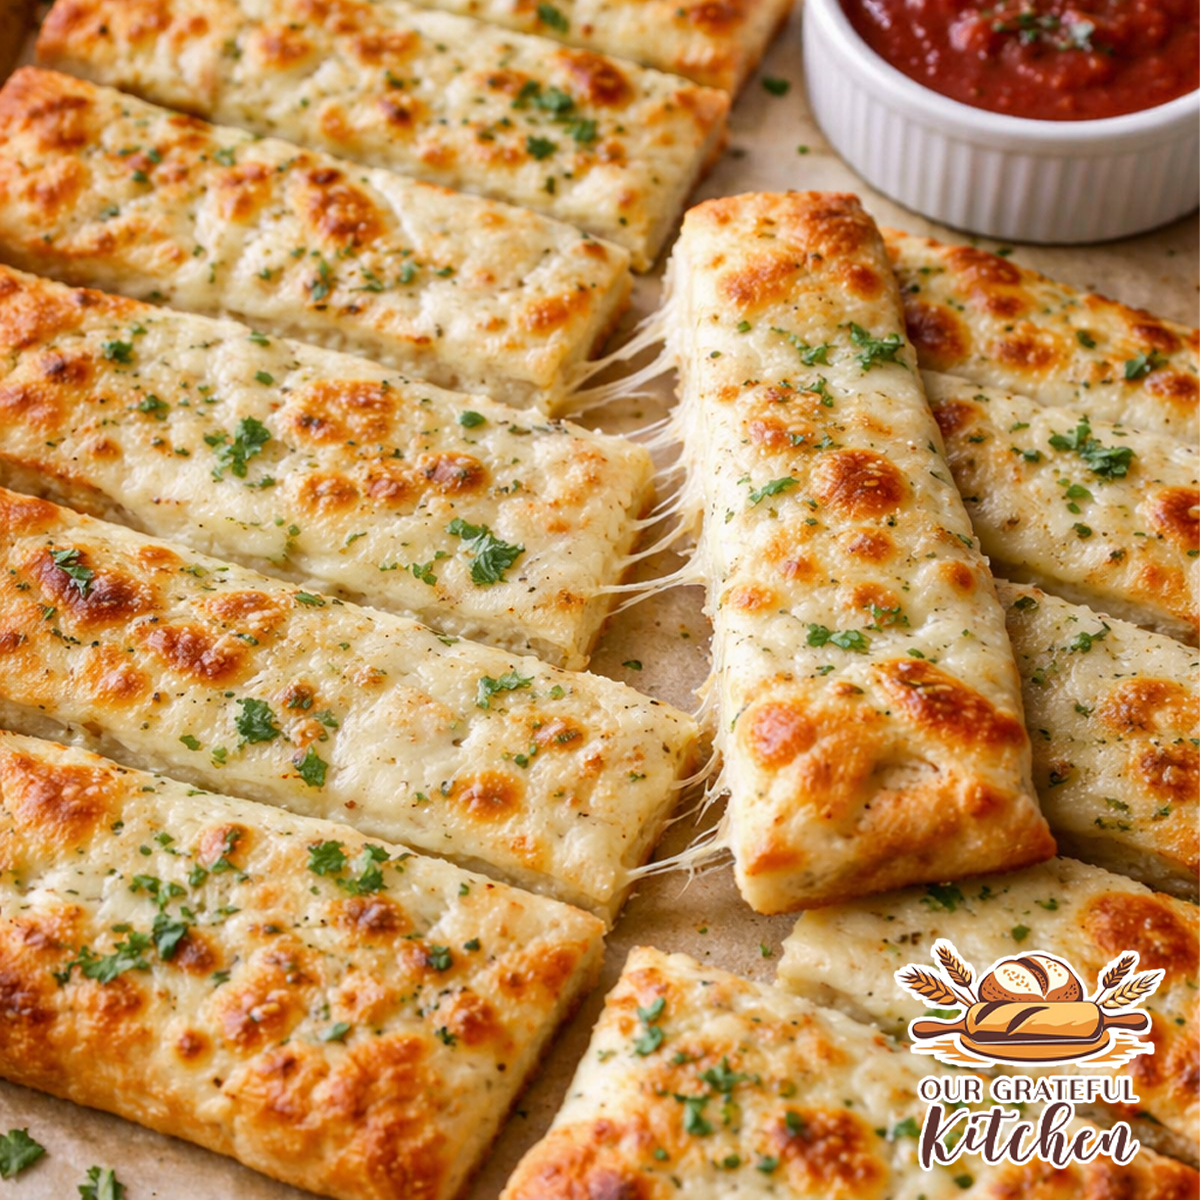
There’s something about warm, pull-apart cheesy garlic breadsticks that instantly makes dinner feel complete. Soft on the inside, lightly crisp on the bottom, and topped with golden, bubbly mozzarella, these homemade breadsticks are the kind that disappear quickly at our table.
If you love from-scratch bread recipes like my Dutch oven bread or homemade dinner rolls, this one fits right into that same cozy, comfort-food category. And just like many of my bread recipes, this dough has one small ingredient that makes a noticeable difference — a splash of vinegar for extra softness.
Baked on a hot pizza stone and cut into classic rectangular pull-apart strips, these taste like your favorite pizza-parlor breadsticks — but better. Serve them with my homemade marinara, southwest ranch, or buttermilk ranch, or alongside pasta like Chicken Alfredo or Cajun Chicken Pasta for a complete family dinner.
Why You’ll Love This Recipe
- Soft and fluffy interior with lightly crisp edges
- Golden, slightly broiled cheesy top
- Classic pizza-style pull-apart rectangles
- Simple yeast dough that comes together quickly
- Perfect for dipping in marinara, ranch, or southwest ranch
Ingredients
- Instant yeast
- Granulated sugar
- Warm water
- Oil & Salt
- White vinegar
- All-purpose flour
- Garlic butter
- Freshly grated Parmesan cheese
- Shredded whole milk mozzarella
")
If you love bold pizza flavor, use my Homemade Pizza Seasoning in place of store-bought Italian seasoning. It’s perfectly balanced for pizza and bread recipes. Serve these breadsticks with Homemade Pizza Sauce (No Cook) or warm Homemade Marinara Sauce for the ultimate dipping experience.
Equipment Needed
- Stand Mixer – Makes kneading quick and easy with a dough hook.
- Pizza Stone – Helps create a crisp, bakery-style bottom.
- Parchment Paper – Allows easy transfer onto the hot stone.
- Pastry Brush – For evenly spreading garlic butter to the edges.
- Pizza Cutter – Makes clean rectangular pull-apart cuts.
How to Make
Begin by combining the warm water, sugar, and yeast in the bowl of your stand mixer. Whisk gently and allow it to sit for about five minutes. You’re looking for light foam on the surface, which confirms the yeast is active.

Add the oil, salt, and white vinegar. That small splash of vinegar helps tenderize the dough and creates a softer finished texture without adding any noticeable flavor.
With the dough hook attached, begin mixing on low-medium speed. Gradually add the flour and allow the dough to knead for 3–5 minutes. The dough should become smooth and elastic. It should feel slightly tacky but should not stick to your fingers.

Preheat your oven to 475°F with your pizza stone inside. Heating the stone in advance is what gives the bottom of these breadsticks that lightly crisp finish.
Place a large piece of parchment paper on your counter and turn the dough out onto it. Gently press and stretch the dough into a large rectangle about ⅓-inch thick.

Spread the garlic butter evenly over the entire surface, making sure to go all the way to the edges. Sprinkle the Parmesan first, then top with mozzarella for a balanced melt and golden finish.
Carefully transfer the parchment and dough onto the hot pizza stone. Bake for 8–12 minutes, or until the cheese is melted and the edges are lightly browned. For a more golden top, broil for 30–60 seconds at the end.

Allow the bread to cool slightly, then cut into rectangular pull-apart sticks. Serve warm with marinara, southwest ranch, or alongside your favorite pasta dinner.
")
This post may contain affiliate links. As an Amazon Associate, I earn from qualifying purchases.
PrintCheesy Garlic Breadsticks (Pizza Hut Style Pull-Apart)

Soft, fluffy homemade cheesy garlic breadsticks baked on a hot pizza stone for golden edges and a melty mozzarella top. Cut into pull-apart rectangles and brushed with garlic butter, these bakery-style breadsticks are perfect with homemade marinara, ranch, or alongside your favorite pasta dinner.
- Prep Time: 15 minutes
- Rise Time: 5 minutes
- Cook Time: 8-12 minutes
- Total Time: about 30 minutes
- Yield: 8-10 breadsticks
- Category: Appetizer, Appetizers, Bread, Pizza
- Method: Baking
- Cuisine: American
Ingredients
Dough
- 1 ¼ tsp instant yeast
- 1 tsp granulated sugar
- ¾ cup warm water
- 1 ½ TBSP oil
- 1 tsp salt
- ½ tsp white vinegar
- 1 ½ cups all-purpose flour
Topping
- 2 TBSP garlic butter
- ⅓ cup freshly grated Parmesan cheese
- 1 ½ cups shredded whole milk mozzarella
Instructions
- In the bowl of your stand mixer, combine warm water, sugar, and yeast. Whisk gently and let sit for 5 minutes until slightly foamy to ensure the yeast is active.
- Add oil, salt, and white vinegar. (The small splash of vinegar helps create extra softness in the finished breadsticks and improves overall texture.)
- Fit your stand mixer with the dough hook. Begin mixing on low-medium speed and slowly add the flour.
- Knead for 3–5 minutes, or until the dough is smooth and elastic. The dough should be slightly tacky but should not stick to your fingers.
- Preheat your oven to 475°F with a pizza stone or cookie sheet (placed upside down) inside.
- Place a large piece of parchment paper on your counter. Turn the dough out onto the parchment and gently spread into a large rectangle about ⅓-inch thick.
- Prepare your garlic butter and spread evenly over the dough, all the way to the edges.
- Sprinkle Parmesan evenly over the top, followed by mozzarella.
- Carefully transfer the parchment and dough onto the hot pizza stone. (Do not remove from oven)
- Bake for 8–12 minutes, or until the cheese is melted and golden and the edges are lightly browned.
- Remove from oven and allow to cool slightly before cutting into rectangular pull-apart breadsticks.
- Serve warm with homemade pizza sauce, marinara, ranch, or southwest ranch.
Notes
-
For extra golden tops, broil for 30–60 seconds at the end of baking.
-
Whole milk mozzarella melts more smoothly and gives a better cheese pull.
-
If dough feels sticky, add 1–2 TBSP flour gradually while kneading.
-
Store leftovers in an airtight container for up to 3 days.
-
Reheat at 350°F for 5–7 minutes to restore texture.
Tips for success
For the best texture, make sure your pizza stone is fully preheated before baking. This step gives you that lightly crisp bottom while keeping the inside soft.
If you prefer extra garlic flavor, brush a small amount of additional melted garlic butter over the breadsticks right after baking.
Tips for little helpers
Let kids help sprinkle the cheese or “design” the rectangle before baking. It’s an easy way to get them involved in the kitchen.
Storage
Store leftover breadsticks in an airtight container in the refrigerator for up to 3 days. Reheat in the oven at 350°F to restore texture. Avoid microwaving if possible, as it softens the crust.
Variations / Serving Ideas
Cinnamon Sugar Breadsticks
Use the same dough and shape into breadsticks as directed. Brush generously with ½ stick melted butter. In a small bowl, mix ½ cup sugar with 2 TBSP ground cinnamon, then sprinkle evenly over the buttered breadsticks before baking.
Switch up the cheeses
Mozzarella and Parmesan create a classic garlic bread flavor, but you can substitute any shredded cheese you prefer. Try provolone, Monterey Jack, Colby Jack, or even a mild white cheddar for a different flavor profile. I really like Cheddar and Pepper Jack!
- Serve with Homemade Marinara or Homemade Pizza Sauce for dipping
- Pair with ranch or southwest ranch for dipping.
- Add red pepper flakes for heat.
- Top with chopped parsley after baking for fresh flavor.
- Turn into pepperoni garlic breadsticks by adding sliced pepperoni before baking.
Turn It Into Pizza
This dough is derived and scaled from my pizza dough recipe. Use it to make one large pizza crust instead of breadsticks, or double the recipe to make both pizza and breadsticks for an easy family dinner! Browse all my Pizza recipes for more ideas!
Final Thoughts
These cheesy garlic breadsticks are one of those simple recipes that feels a little special without requiring much effort. Whether you’re serving them with Pasta,Chili, or as a side for Pizza night, they’re the kind of homemade comfort food that brings everyone back for seconds.
Leave a Reply