This post may contain affiliate links. As an Amazon Associate, I earn from qualifying purchases.
There are certain traditions in our home that mean more to me with every passing year, and baking my children’s birthday cakes is one of them.
When my daughter turned thirteen, I wanted her cake to feel extra special — something memorable, a little bit elegant, and worthy of such a milestone birthday. After stacking the layers and carving the design, I stepped back to admire the finished cake… and then looked down at the counter covered in perfectly good cake scraps.
Throw them away? Not a chance.
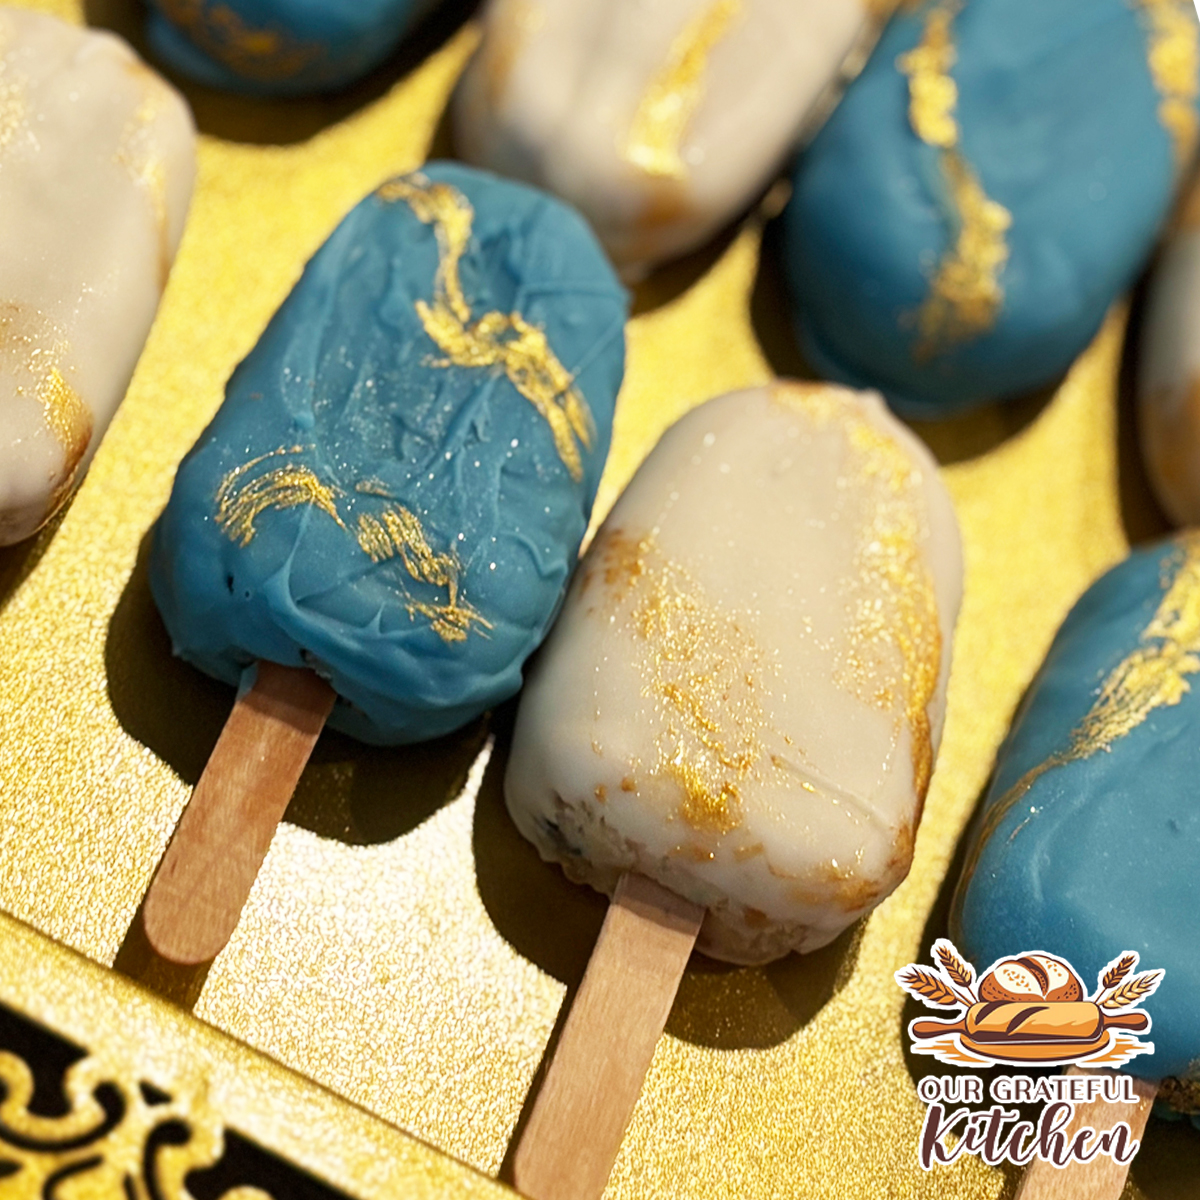
Instead, those leftover pieces became some of the prettiest cake pops I’ve ever made — marbled in soft blues and whites with delicate gold accents. They ended up being just as talked about as the cake itself.
If you’ve ever leveled a cake and wondered what to do with the extra pieces, this is one of my favorite ways to turn what might have been waste into something truly beautiful.
And honestly? It’s much easier than it looks.
Why You’ll Love This Idea
- Prevents food waste while stretching your baking efforts
- Perfect for birthday parties, showers, or holiday trays
- Surprisingly simple once you know the method
- A great make-ahead dessert – we pop these in the freezer after they’re finished and pull one out when we need a sweet treat!
- Completely customizable for colors and themes
This is the kind of kitchen win that makes you feel both practical and a little creative at the same time.
Ingredients
You only need a few basics:
- Leftover cake pieces – I use my Classic White Cake
- Buttercream Frosting – I have several recipes posted, choose your favorite!
- Candy melts or melting wafers
- Gel food coloring (optional)
- Edible gold markers, paint, dust or sprinkles (optional)
👉 For the cake scraps, I used pieces from my sturdy white cake recipe that is specifically designed for layering and stacking.
Equipment Needed
Stand mixer or hand mixer — Helps quickly blend the cake and frosting into the perfect texture.
Cake pop Molds — Keeps the cake pops uniform so they look polished on a serving tray.
Parchment-lined baking sheet — Prevents sticking while the pops set up in the freezer.
Microwave-safe bowl — Ideal for smoothly melting the candy coating.
Food Safe Popsicle sticks — Makes dipping and serving easy, especially for parties.
How to Make Marble Cake Pops from Scraps
The key to great cake pops is balance — you want the mixture moist enough to hold together, but not so soft that it becomes dense or heavy.
Start by crumbling the cake scraps into fine, even pieces. As odd as it might sound, I use my meat chopper for this! This creates a smooth base and prevents lumps in the finished pops.

Add frosting gradually, mixing just until the crumbs hold together when pressed. It should feel similar to soft cookie dough — cohesive, but not sticky.

After shaping the mixture into the molds and inserting the popsicle stick, a short time in the freezer helps them firm up before dipping. This step makes coating much easier and keeps the cake pops from sliding off the sticks.

For the marbled finish, dip a flat craft paint brush into metallic gold edible paint and create your “marble” design onto the chocolate. Don’t go too heavy or the paint won’t set, it needs to be a fairly thin layer. A light brush of edible gold adds a subtle shimmer that makes them feel celebration-worthy without requiring complicated decorating skills.

Sometimes the simplest techniques create the biggest visual impact.

Want to know how I made this Geode Cake? Check out my full tutorial!
This post may contain affiliate links. As an Amazon Associate, I earn from qualifying purchases.
PrintMarble Cake Pops from Cake Scraps

Turn leftover cake into beautiful marble cake pops with this easy method. Perfect for birthdays, parties, and celebrations, these cake pops are a creative way to prevent waste while making an impressive homemade dessert.
- Prep Time: 45 minutes
- Chill Time: 1 hour
- Total Time: 1 hour 45 minutes
- Yield: 18-24 cake pops
- Category: Dessert
- Method: No Bake, No Cook
- Cuisine: American
Ingredients
- 4 cups crumbled baked cake (from leftover cake layers or trimmings)
- ½–¾ cup buttercream frosting
- 12 oz white candy melts
- Food Grade Popsicle Sticks
- 12 oz colored candy melts (white, teal, or other preferred color)
- Edible gold paint, dust or sprinkles (optional)
Instructions
- Crumble the cake
Place cake scraps in a large bowl and crumble until very fine with no large pieces remaining. - Add frosting gradually
Mix in frosting a few spoonfuls at a time until the mixture holds together when pressed. The texture should resemble soft cookie dough — moist but not sticky. - Shape the cake pops
Push mixture into cake pop molds to shape and insert popsicle sticks – press firmly down so the cake holds onto the stick. You can alternatively melt a little of the candy melts and dip the end of the popsicle stick into the candy melt before inserting into the cake pop. - Chill
Place shaped cake pops on a parchment-lined baking sheet and refrigerate for at least 1 hour, or until firm. - Melt the coating
Melt candy melts in a microwave-safe bowl in 30-second intervals, stirring between each until smooth. - Dip and coat
Submerge each cake pop into the melted coating, allowing excess to drip off before placing upright or laying flat to set. - Add decorative accents
If desired, brush lightly to create the marble pattern with edible gold paint. - Let firm completely
Allow coating to harden at room temperature or refrigerate briefly before serving.
Notes
- Use high-quality candy melts for smoother dipping and better flavor.
- If the coating becomes too thick, stir in a small amount of coconut oil to thin it.
- Working in small batches keeps the candy melts from cooling too quickly.
👉 Looking for the perfect cake to use for this recipe? Try my sturdy white cake designed specifically for layering and stacking.
Tips for Success
- Chill the shaped cake pops before dipping for cleaner coating
- Avoid adding too much frosting — it can make the texture heavy
- Melt candy slowly to prevent thick or clumpy coating
- Let excess coating drip off before placing them down
- Work in small batches so everything stays manageable
Storage & Reheating
Store: Keep cake pops in an airtight container at room temperature for up to 3 days, or refrigerate for up to a week.
Freeze: Cake pops freeze beautifully. Place them in a single layer until solid, then transfer to a freezer-safe container.
Serve: If chilled, allow them to sit at room temperature briefly before serving for the best texture.
Frequently Asked Questions
Can I use any cake flavor?
Absolutely. Chocolate, vanilla, funfetti — even red velvet works well.
What if I don’t have leftover cake?
You can bake a simple cake specifically for cake pops, but this method is especially wonderful after trimming layer cakes.
How much frosting should I add?
Start small. You can always add more, but you can’t remove it once mixed.
Do cake pops need to be refrigerated?
Not necessarily, but they will last longer if kept cool.
Variations & Serving Ideas
- Match the colors to a birthday theme
- Use pastel tones for baby showers
- Try metallic accents for anniversaries
- Display them standing upright in a decorative container
- Arrange them on a tray for an effortless dessert table
They’re the kind of treat that makes guests assume you spent far more time than you actually did.
Final Thoughts
There is something so deeply satisfying about using every bit of what you bake — especially when it turns into something this special.
Making my children’s birthday cakes each year is a tradition I treasure, and finding small ways to extend that celebration just makes it that much sweeter.
These marble cake pops started as leftovers, but they quickly became a favorite part of the memory.
And if you ask me, those are the very best kinds of recipes to pass along!
Leave a Reply